Quite a guy as he had quite a few tip and tricks up his sleeve.
I will not reinvent the wheel instruction of how to use here.
BEFORE I FORGOT, YOU NEED A SUPPORTED CHIPSET TO READ THE RAM CORRECTLY!
THE SOFTWARE WILL NOT RUN CORRECTLY ON CERTAIN CHIPSET.
I did as instructed and flashed both my RAM to PC2-6400 from PC2-5300 but Aspire 4530 only reads 667MHZ as shown in CPU-Z.
But the RAM timings improved and performance improvement for free is considered great.
Only thing I have to warn you is like flashing BIOS it can kill your RAM, so try to flash settings as close to your original RAMs as possible.
Take a look at my upgraded RAM originally it was PC2-5300 at 333MHZ
I even got in an EPP Profile!
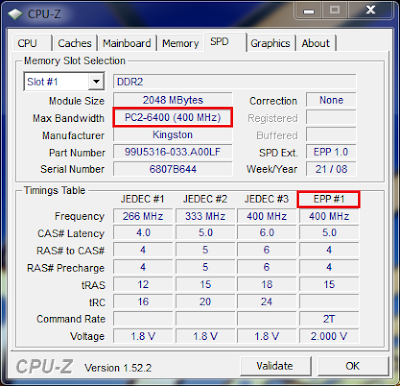 In other words this Tool is a must have!
Simple Step by Step Guide:
1)You must run this software on a Compatible Chipset.
Certain NForce Chipset like the one on the Aspire 4530 WILL NOT work.
2)First extract this program to a location you find comfortable to run it in.
Right Click and Run as Administrator.
Agree to the EULA.
3)Click on EPROM, Read SPD at 50H or 52H if you have 2 RAM SLOTS occupied.
If you have 1 RAM SLOTS only either 50H or 52H will be available.
 If it is read correctly you should see the Module Specification read correctly as shown above.
An example of incompatible Chipset is shown below.
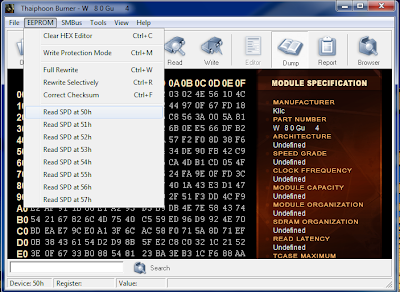
First notice the numerous SPD displayed.
Next the Module Specification is incorrectly displayed.
Do not proceed if you encountered the above.
4)Next Click on Browser button.
Then Click on Download button.
 It will proceed to download all the RAM dumps from the server as shown above.
5)Using the search parameter find the next closest update in RAM Specification
For Example you have a Kingston DDR2-667MHZ find the next closest DDR2-800 based on the
Module Code Number and Parameters.
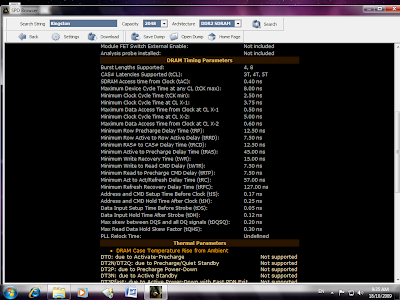
 Click Save Dump and save it to a location on your Harddisk
7)Next Exit the Browser Back to the Main Menu.
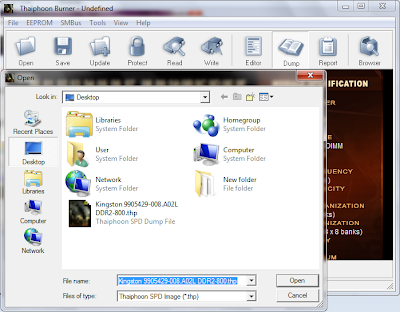 Select Open and Choose the Dump File you saved previously.
8)It should open up the Dump File details.

Choose EEPROM Select Full Rewrite.
9)You should see the Full SPD Rewrite Windows as shown below.
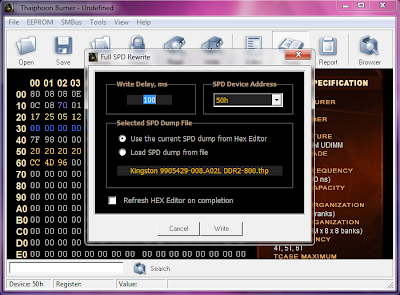
Select the correct SPD Device Address and click on write.
Wait for the process to complete and you are done!
Không có nhận xét nào:
Đăng nhận xét