Hiển thị các bài đăng có nhãn optimize. Hiển thị tất cả bài đăng

Thứ Bảy, 23 tháng 10, 2010

Checking Battery Capacity in Windows 7

Alternatively there is a Free software to measure power consumption by Microsoft Research.
It is called JouleMeter.
Find out more about it here.

A new feature in Windows 7 is the ability to check battery capacity.
Take a look at the following:

Open a Command Prompt Windows with Administrative Permission
Enter:
powercfg /Energy

It will create a report in
C:\Windows\system32\energy-report.html

There is one line like this
Battery:Battery Information
Battery ID 11121SANYOAS07A31
Manufacturer SANYO
Serial Number 11121
Chemistry LION
Long Term 1
Design Capacity 48840
Last Full Charge 41214
The amount of battery life left can be calculated by
eg. 41214/48840*100
Formula:  (Last Full Charge)/(Design Capacity) * 100
Which equates to 84.38% meaning my laptop battery has only 84.38% of charge left (because I didn't take good care of it. There was a few times when the battery was almost fully drain)

So make sure you switch off the laptop or connect it to an AC outlet when battery life reaches 10% and do not expose it to high temperatures.

Alternatively you can download the new HWMonitor as it reports the charge capacity directly.

Thứ Năm, 25 tháng 3, 2010

Synaptic Driver Update Feature Must See!


(Opened FTP Ports required to download the driver)
Synaptics HP Touchpad driver unlocks all multitouch gestures on all touchpad > version 6.2.
Now I officially have multitouch on my Acer Aspire 4530!
You guys seriously must update to this driver. One Word: Awesome!

New Features:
-3 Fingers Application Launch
-2 Fingers Scrolling
-Flick Function etc...

Please note the amount of features unlocked by this driver may vary according to the touchpad version you own.
You need at least a V6.2 Touchpad.


To install:

Continue to Click Yes when you see install messages.
Restart the Computer.
Next:
Double Click:
The filename may differ due to different versions

Continue to Click Yes to All Messages.
After that restart.

To Access The Configuration Utility:

Thứ Tư, 7 tháng 10, 2009

Windows 7 Boot Optimization Error

I am not sure if you guys know you can manually invoke Windows 7 defragmentation Tool to do boot optimization by using the /b flag.

When you run defrag.exe, you get the following
Microsoft Disk Defragmenter
Copyright (c) 2007 Microsoft Corp.

The parameter is incorrect. (0x80070057)

Description:

Locates and consolidates fragmented files on local volumes to
improve system performance.

Syntax:

defrag | /C | /E [/H] [/M | [/U] [/V]]
defrag | /C | /E /A [/H] [/M | [/U] [/V]]
defrag | /C | /E /X [/H] [/M | [/U] [/V]]
defrag /T [/H] [/U] [/V]

Parameters:

Value Description

/A Perform analysis on the specified volumes.

/C Perform the operation on all volumes.

/E Perform the operation on all volumes except those specified.

/H Run the operation at normal priority (default is low).

/M Run the operation on each volume in parallel in the background.

/T Track an operation already in progress on the specified volume.

/U Print the progress of the operation on the screen.

/V Print verbose output containing the fragmentation statistics.

/X Perform free space consolidation on the specified volumes.

Examples:

defrag C: /U /V
defrag C: D: /M
defrag C:\mountpoint /A /U
defrag /C /H /V

Notice there is no /B flag but it is there.
However on a fresh Windows 7 installation when you try to do this with Administrative Permission in a Command Prompt Window.
C:\Windows\system32>defrag C: /B
You get some message saying it cannot be done like the following:
Microsoft Disk Defragmenter
Copyright (c) 2007 Microsoft Corp.

Invoking boot optimization on (C:)...

Analysis: 100% complete.

Some registry entries were missing from the boot optimization section of the reg
istry. (0x89000017)

How to resolve this?
The issue is the idle tasks Windows is scheduled to run hasn't run once yet hence it cannot initialize boot optimization.
So to resolve simply open a Command Prompt Windows with Administrative Permission again and run the following commands to invoke the idle task.
C:\Windows\system32>Rundll32.exe advapi32.dll,ProcessIdleTasks
After that the error message will be gone and you can run boot optimization manually.

Why doesn't this happen sometimes?
Because RunIdle task is scheduled to run eventually after sometime of idle usage
if you do boot defrag immmediately after installation,
RunIdle task hasn't got a chance to run at all so you have to invoke it manually
if you want to start the operation immediately.

Thứ Ba, 28 tháng 7, 2009

Streaming Video Using VLC

Edit:

There is a new solution. Simply go to adobe labs and install the new Flash Plugins 10.1 instead of 10.0.
The new plugin promises to offload video processing to the GPU reducing the CPU load.
Please remember to uninstall the old plugin before installing the new plugin.

If you installed it correctly and ran GPU-Z while watching youtube you should see this.


Here is a alternative solution for people having problems streaming youtube.
As you know youtube uses CPU to render the video hence if your CPU is not powerful enough you may experience playback issues (eg. Aspire Timeline with SU2700 Processor).
All laptop comes with good enough Graphics Processor to handle flash videos actually however to make use of the GPU to render flash you need VLC to convert the flash to utilise Video Codecs so the GPU can decode it here is a step by step guide.

Firstly download and install VLC

Next set VLC to DirectX so GPU will be utilised by VLC for playback


Next Launch VLC and select "Open Network Stream"


Enter the URL Containing the Video

Select Play and you are done!

To prove that CPU utilisation is lower using VLC playback:


Note the CPU utilisation averages at about 30-40%

While using VLC (Note: using GPU rendering forces the computer to turn off Aero Glass)

CPU utilisation averages between 10-20%.
The initial CPU spike is due to launching VLC and Setting it to URL Stream Mode.

However I have yet to figure out how to change the URL to High Quality Mode.
Suggestion anybody?

Edit: I found out how just append &fmt=22 to the end of the URL

Thứ Hai, 6 tháng 7, 2009

Optimize Windows Vista Boot

What you should do to conserve and optimize disk space and boot time.

1) After download software like Firefox, after installation please delete the installer.


eg. Setup.exe

New Versions will come out and internet download speeds are so fast, so there is no point keeping it.

2) Do this weekly:
Start>> All Programs>> Accesories>> System Tools>> Disk Clean Up


Check Everything Except for Hibernation File.

Or download and install a autodiskcleanup script I created

CCleaner is a extra ware that does the same thing it uses System Resource hence I don't use this.

3) Open Control Panel >> Administrative Tools >> Services
Disable "SuperFetch"
Stop "Superfetch"
Reason being Superfetch isn't very efficient, very often it overfetches Programs you rarely use, increasing boot time as a result.

4) Clean temporary Directories.
They are:

C:\Users\{Your User Name}\AppData\Local\Temp
C:\Windows\Temp
C:\Windows\Prefetch (Delete the ReadyBoot Contents before ReadyBoot folder)
I have created a batch file to kill superfetch.
Download and run with Administrator permission here (Superfetch Killer)
5) Here is a Windows Batch File that clears useless file recursively in all directories.
Batch file is provided by mydigitallife

Open in Notepad to see the script content.
To Run, Right Click "Run as Admin"

Next run sdelete to zero the harddisk space and return all unused space

Use the command:
sdelete -c
After that do a Disk Defragmentation and Reboot

Using this method my Acer Aspire 4530 now boots in 5 Rolling Bars instead of the previous 18 &
My 5 year old Desktop has the following specification:
Intel Pentium 4 HT 2.8GHZ 512KB L2 Cache (NorthWood)
4GB DDR RAM 400MHZ
250GB WD 16MB Buffer Cache
875P Motherboard
Currently the dinosaur is running Windows Vista rather speedily so try it!


Thứ Ba, 30 tháng 6, 2009

How To Clear Up your Disk on Windows Xp and Vista

To Clean up your Disk it is actually very simple
There are only a few place where the junk gather
  1. Take a Look at C:\
  • You should only see the following 3 folders
  1. Documents and Settings
  2. Program Files
  3. WINDOWS
The rest is either
Driver files loaded by OEM
Lazy users who refuse to save it to their home directory respectively
Programs which do not install by default to Program Files Directory (and the installer did not bother to redirect the program there he/she just keep clicking NEXT NEXT NEXT FINISH)

They are all deletable except for the Programs which is better to reinstall via Control Panel into the correct Program Files directory to keep it neat

For Windows Xp you can clear up on the following folders
You may encounter file in use because the operating system is currently using the caches so it is locked
If you encounter this you can just skip that particular file
  • C:\WINDOWS\Temp
I need to elaborate on Prefetch
Prefetch is a place where the system cache certain programs so it can run faster
The official stand is that it is a self managing folder where rarely used program will get cleaned up automatically however you can still clear it up once it a while
After you clear up the system will need to prefetch again however there is no harm or any sort done
Also you will notice the system boots faster immediately after you clear Prefetch because Prefetch is loaded on boot so when it is cleared up it boots faster
  • C:\WINDOWS\Prefetch
Next Open (Delete everything inside)
  • C:\Documents and Settings\User\Local Settings\Temp
At the end of it there is already a tool to clean up your disk
It is called Disk Cleanup
It clears all the above mention folders except Prefetch.

The following is a disk cleanup script from mydigitallife for Windows Vista
@echo off
cls
TITLE Windows Vista System Junk Cleaner v1.0
echo.
echo Windows Vista System Junk Cleaner
echo Version 1.1
echo.
echo (C) 2007 My Digital Life (www.mydigitallife.info)
echo.
echo This batch script is provided as is without warranty.
pause
echo.
echo.
echo Start cleaning and deleting Vista system junk?
echo (Press Ctrl-C and answer Y to terminate)
pause
cls

del /f /s /q %systemdrive%\*.tmp
del /f /s /q %systemdrive%\*._mp
del /f /s /q %systemdrive%\*.log
del /f /s /q %systemdrive%\*.gid
del /f /s /q %systemdrive%\*.chk
del /f /s /q %systemdrive%\*.old
del /f /s /q "%appdata%\Microsoft\Windows\cookies\*.*"
del /f /s /q "%userprofile%\Local Settings\Temporary Internet Files\*.*"
del /f /s /q "%userprofile%\Local Settings\Temp\*.*"
del /f /s /q "%appdata%\Microsoft\Windows\Recent\*.*"
del /f /s /q %windir%\*.bak
del /f /s /q %windir%\prefetch\*.*
del /f /s /q %windir%\SoftwareDistribution\Download\*.*
rd /s /q "%userprofile%\Local Settings\Temp\" & md "%userprofile%\Local Settings\Temp\"
rd /s /q %windir%\Temp & md %windir%\Temp

cls
echo.
echo Windows Vista System Junk Cleaner
echo Version 1.1
echo.
echo (C) 2007 My Digital Life (www.mydigitallife.info)
echo.
echo This batch script is provided as is without warranty.
echo.
echo.
echo Vista system junk cleaning and deleting completed.
echo.
echo Press any key to exit.
pause
Just copy the script onto notepad, save as diskcleanup.bat.
Run with admin permission.
As you can see the script is completely clean.

Chủ Nhật, 28 tháng 6, 2009

Crazy Stuff I Did To Lower The Temperature Of The Laptop

Here is the deal:
You have encounter high temperatures especially during gaming.
You contacted the Repair Centre.
They told you to update the BIOS (usually the fix include making the fan spin more often).
You have sent the laptop back and forth until you have given up.

Finally the warranty run out and you can only depend on yourself.

Below are the following mods you can do.


For me I did the following:

Note: Most steps require dismantling of the system it will help with expert supervision and googling and down loading of service manual to dismantle it.

  • Throw away the thermal pad on the GPU and use Arctic Silver 5 instead
  • Remove the original CPU thermal paste and use Arctic Silver 5 instead.
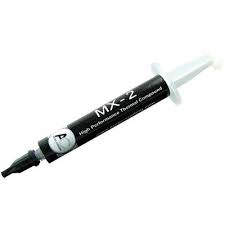
Arctic Cooling MX-2
Arctic Silver 5

  • Remove and throw away the "air filter" below the Laptop bottom cover to allow better air flow (I decided to do this after realizing this is the only part you can feel that air actually goes into the laptop, hence obstructing it restricts air flow hence remove it)
  • Sand the surface of heatsink which comes into contact with the GPU or CPU chip, using FINE SILICON CARBIDE PAPER
  • Sharpen the edges of the air vent casing (I got this inspiration by observing other Acer Aspire Laptop (Aspire 4935G) models, I noticed their vent size is gigantic compared to the vent size of this particular model hence it could be one of the gaming overheating factors. The new Acer Aspire 4736ZG Series Air Vents actually have even bigger holes than 4935G!)
Original (Top view)

Modified (Shave the vent corners)(Top view)

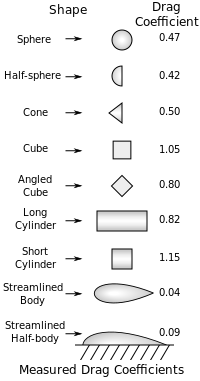
Actually the best cutting should be a wing shape pointing into the chassis.
The smaller the air drag the better.


Not sure how much of this helps
But now my gaming temperatures fall below 90 degrees (around 85) and my idle temperature falls below 60 degrees (around 55) for the GPU.

Check out my recently modded laptop thermal exhaust:

Compare it to your original Aspire 4530 exhaust spot any difference?
Originally it has 16 dividers I cut out 8 of them so it looks like this.

5) I added Aluminium tape to bridge the laptop bottom chassis which is made out of metal to the heatsink.


Aluminium Tape

How I did it.

I rolled and flatten out one piece of Aluminium Tape to thicken it made sure it stucked in between the two interface without falling off (but not too tight).
Then I stick a tape over the heatsink and the chassis for better conduction.
The lowest temperature is now under 55 degrees hence it pretty much works.


7) Set the Graphics Mode to performance.

Thứ Bảy, 13 tháng 6, 2009

Tweak Firefox to return search in URL Bar

Tweak Firefox URL Bar to return search results

Most modern web browser such as Firefox, Google Chrome, Safari and Internet Explorer (IE) is able to handle invalid URL or link location that user to type into address bar or location bar. The most typical option is automatically treat input as a query string or term, and search for it using default search engine.

Firefox takes “auto-correction” feature in address location bar a step further by automatically redirect user to a web page that it assumes user is looking for, much like Google’s “I am feeling lucky” feature. In fact, Firefox is using Google search engine to find possibly related or matching website and then direct Firefox to open the lucky first link returned by the Google.

For user who prefer to see a list of matching websites or search results instead of auto redirect to a web page when entering keywords in the Firefox’s link location bar, it’s possible to change the Firefox behavior by modifying its configuration using steps below.

  1. Run Firefox.
  2. Enter about:config into the address bar.
  3. Locate keyword.url or type keyword.url into “Filter” text box to search for it.
  4. Double click on the line of “keyword.url”.
  5. By default, the string value for “keyword.url” is “about:neterror?e=query&u=”. To display search results instead, replace the string with one of the following search statements, depending on the search engine you prefer:

    Google: http://www.google.com/search?q=
    Yahoo!: http://search.yahoo.com/search?p=
    Windows Live Search: http://search.live.com/results.aspx?q=

    Change Firefox Add Bar Search URL

  6. Click OK when done.

To revert to existing behavior where best matching site will be shown immediately on any typo error or keywords and terms been entered, just set the “keyword.url” value back to “about:neterror?e=query&u=” (without quotes).

Source:http://www.mydigitallife.info/2009/06/12/hack-to-modify-firefox-3-address-bar-to-return-search-results-when-query-or-invalid-url-is-entered/

Chủ Nhật, 7 tháng 6, 2009

UnderVolting AMD Griffin Processor


Edit:
You can read continue to read this as a guide but this is a better tool IMHO.

I chanced upon this site : http://amd.goexchange.de/

This is a new Tool designed to undervolt AMD Griffin ZM/RM/QL/SI Processors.
The program is free for home users (However you are encouraged to donate as it is a lot of work) and it is not free for business users


1)Why Undervolt?
In short conserve power (Battery Life) and reduce thermal emission (Overheating) with no effect on Computing Performance for more info check on the previous link.

2)For Intel Processors and AMD TL and older Series Mobile Processors RMClock is able to overclock them.

However no tool was available to underclock CPU until this tool was release.

How to use?

The documentation on the site is very lengthy and rather confusing.
I was confused first time I read it.

A very simplified guide as follows:

1) Create a folder in Program Files.
eg. Create C:\Program Files\GriffinControl

2) Download the files required (scroll down a bit you should see 2 files each for 32bit and the other 2 files for 64bit) and extract them to the folder you created in 1).

3) Open the GriffinControl_config.xml with notepad (the author provided a skeleton configuration file) .

You will only be looking at the following column and the values in bold
Note QL/SI Processor only should have 2 pstate number (I think it is 0 and 1 , no 2 not sure about this).
How do you go about setting voltage?

Basically AMD ZM/RM Series Processors has 3 Power State.

A full state runs at max frequency when you need the processing power it throttles up to maximium frequency giving you the computation power you need.
This is pstate number 0 which is 100% of the total CPU Power.
pstate number 1 is 50% of the total CPU Power.
pstate number 2 is 25% of the total CPU Power.

If you set too low a voltage the CPU will not run stably due to unsufficient voltage and cause BSOD.

For QL/SI Processor you only have 2 pstate, 0 & 1.
pstate number 0 which is 100% of the total CPU Power.
pstate number 1 is 50% of the total CPU Power.

How do you know the default voltages for the CPU?
Either you run CPUZ as shown by the picture at the end of this entry.
Then use Vista Processor Power Management to throttle at different percentages to find the 3 or 2 voltage level depending on what processor you have.
If you are not sure you can leave a comment at the end of this entry I will recommend values for you to try.
Another way is to refer to the config file provided with the downloads.

4)Reference this table for the list of Voltage ID.
eg. The value 42 as shown above translate to 1.025V and so on.

(Note the lowest VID is 64 no lower values will work and value above 36 can fry your processor )

Edit the values to the voltage you want.

For my RM-72 Processor, I tested 64,52 and 42 is the most extreme stable values.
Which translate to: 0.750V, 0.900V and 1.025V respectively.
Original Voltage: 0.800, 0.950V and 1.075V respectively.
A difference of 0.05V, 0.05V,0.05V , any higher it BSODS

Change the values accordingly and save.

6)Run GriffinControlService_32bit.exe for 32bit Windows and GriffinControlService_64bit for 64bit Windows.
Follow instruction and create the Windows Service if you encounter an error message you did something wrong.
Go to Services Menu and Start the Service if you ever want to delete the service you must stop it first (using the same manner, stopping it instead of starting it)
If you are doing testing make sure the service is set to manual start instead of Automatic so after BSOD it will default to original value and not BSOD repeatedly I learned this the hard way.
If you did not listen to me and it BSOD repeatedly, when it is possible to get to Windows Either start with last saved configuration or try to switch to Power Saver Mode in Vista Power Plan so it will not cause BSOD again.Don't worry no physical damage is done to the processor.

7) Run a CPU stressing Tool like Intel Burn In make sure no BSOD happens when running the tool so the voltage is stable. Use the Vista Processor Power Management to test the different Power States.
Set to auto start service if you are happy with the final setting.

This program is very well created especially when the author implemented it as a windows service, so donate to the author if you are able to.

Special Thanks to the author, now my CPU Voltage Temperature Dropped by a lot at max frequency.

Proof that it works!

Edit: The Service hung on Vista and created a Windows Event Log (no error message) so I set it to Delay Start and the problem went away.

At the end of the process the result of undervolting implies AMD chips are indeed overworked in order to catch up to Intel Processor Performance, the undervolted amount of 0.05 at max frequency implies this.
Any further undervolting results in BSOD.

Just encountered another BSOD raise voltages by 0.025

Finally whenever you encounter a hardware BSOD (read the message on the BSOD) just raise the voltage by 0.025.
Eg. when you BSOD on youtube you probably need to raise p-state 1 and p-state 2 by 0.025
My guess is when the CPU changes state from 2 to 1 it switches too quickly therefore insufficient voltage to support the boost hence it BSOD.

Thứ Tư, 20 tháng 5, 2009

Partition Manager

If you have disk partitioning issues and you need to do stuff like moving primary partitions around, I recommend Partition Master.
  • Firstly, it is free.
  • Secondly, it offers advance functions that rival the capabilities of payware.
  • Thirdly, the Windows Interface is easy to use.

Chủ Nhật, 15 tháng 3, 2009

Explaining Windows Xp/Vista Startup

Note: This is applicable to BOTH Windows Xp and Vista as msconfig is present in both OS

Another reason why Windows Boot are often very slow because Programs Add themselves to the startup automatically making Windows Start the Programs on EVERY boot whether you need it or not

Start>> Run>>Type "msconfig" >> Enter

You should see this

To disable a particular startup simply uncheck the box next to the entry

If you want to remove a particular entry from msconfig scroll to the left you should see the following

The box in Red indicates the location of the registry entry which the program you installed added in order to start automatically

To remove it
Start>> Run>> Type "regedit" >> Enter

Navigate to the location in Red

You should see something like this:

To remove the entry from msconfig simply delete it from here
  • Always make sure the program you removed is non-essential otherwise certain important third party program will not run
An example from the above is "NvCplDaemon" which is actually Nvidia Graphics Control Panel
  • Unless you really don't need it, it is safer to disable startup from msconfig rather than deleting the registry entry

Chủ Nhật, 8 tháng 3, 2009

Firefox on steroids

Have you ever wondered why Firefox is so popular?

Firefox is fast BUT that is still not the fastest it can go

To put Firefox on steroids do the following:

Type in "about:config" in the URL box (This is the secret switch which allows you to ramp up firefox performance drastically)
Of Course I am assuming you have a excellent internet connection if you are on a 56kps Dial Up no way you will notice improvements

Right Click
Create a new Integer
Enter "nglayout.initialpaint.delay"
Enter "0"

Right Click
Create a new Integer
Enter "browser.cache.memory.capacity"
Enter "-1"

Filter "network.http.max-connections"
Change the value to "64"

Filter "network.http.max-connections-per-server"
Change the value to "32"

Filter "network.http.max-persistent-connections-per-server"
Change the value to "24"

Filter "network.http.max-persistent-connections-per-proxy"
Change the value to "16"

Filter "network.http.pipelining.maxrequest"
Change the value to "8"

Filter "network.http.pipelining"
Change the value to "true"

Right Click
Create a new Boolean
Enter "network.http.pipelining.firstrequest"
Choose "true"

Filter "network.http.pipelining.ssl"
Change the value to "true"

Filter "network.http.proxy.pipelining"
Change the value to "true"

Filter "network.http.redirection-limit"
Change the value to "32"

Filter "network.http.request.max-start-delay"
Change the value to "0"


Create a new Integer "ui.submenudelay"
Set value to "0"

Then RESTART Firefox

Edit: Sorry I forgot to add how to reset the values

First you sort the value by status
Then you right click and reset them


Or alternatively

Start Firefox in safe mode, in the dialog that appears select Reset all user preferences to Firefox defaults, then click Make Changes and Restart


Thứ Bảy, 28 tháng 2, 2009

Ultimate Windows Tweaker Update

Edit:
There is an update to Ultimate Vista Tweaker, however the updates do not introduce new significant tweaks

Tweak Vista to remove as many unwanted functions as possible to make it faster and more responsive
Ultimate Windows Tweaker is actually a front-end for Windows Registry no additional Services or Programs is installed into your system
Get it here
You can alternatively find the registry entries manually and tweak it however it is not worth the time when someone already made a user friendly front end

Tweaks I used
____________________________________________________________________


I disabled the annoying pop up balloon tips because pop ups really irritates me
____________________________________________________________________


I set the Shutdown time to a lower setting
It is not good to set it to the lowest because Vista has lots of services, setting it too low can cause Service Abortion pop ups which is not a good thing and the default shutdown time is too long

I set Menu Speed to fastest because Vista animation is rather slow hence it irritates a user who wants to do real work This tweak will make Vista more responsive

Disable Vista built in Zip if you use third party compression tools no use having 2 identical tools on the machine (Most of the time 3rd party compression tools are better

Disable ReadyBoost because it is really useless
You are better off buying RAM upgrades

Disable Tablet Input if you are NOT using a Tablet
____________________________________________________________________

Disable Autoplay
Autoplay can sometime cause Virus Programs on Thumbdrive to be executed you will not want to test Vista security or your Anti Virus's abilities by enabling this

Disable Windows Mail if you are using Outlook or Thunderbird or anyother Email Client

Disable Windows Media Center if you are not using your PC as a entertainment Centre for TV Programmes
____________________________________________________________________


Hide your server from browsing list so when you connect to a network other PC will not know you are connected to the network

If you don't use Remote Desktop into this machine disable it

Disable File Access to this machine from other PCs in the network for better security

Disable IPC for other users again a security setting

Disable Recent share so your network access history to other Computers will be safe from prying eyes (this is not Internet History but LAN History)

Auto Discovery of Media is redundant (If you want the media files just copy it to your PC :P)

Set the bandwidth setting according to your network performance (Mine is high)
____________________________________________________________________

Thứ Hai, 2 tháng 2, 2009

Maximising Vista Indexing

For those Tech Savy readers you might have heard of advices such as turning off Windows Xp Indexing Services
This is true for the old Indexing Search feature for Windows Xp
The new Indexing feature in Vista is a much improved feature
It is also available for Windows Xp by a different name Windows Search 4.0
For Windows Xp users you need to download it here

You can speed uo performance by making Windows Search Index only Important & Critical Folders
Here is how to do it:


You need to add C:\Windows and C:\Program Files to the list of Index Location.

(If you have a lot of Programs installed do not index C:\Program Files as it will cause high harddisk activity.)

So Windows will be able to locate files for launching or boot much faster


After that you need to let Windows idle so it will start indexing all locations
After Indexing is complete you are done !

Thứ Bảy, 24 tháng 1, 2009

Nvidia PowerMizer

PLEASE NOTE:
Since Nvidia driver Geforce version 185.XX, perflevelsrc is no longer used for controlling GPU throttling.
In Driver Version 19X.XX the GPU performance control is in the control panel.

If your graphics card is running overheating frequently when monitored using HWMonitor and you happen to be using Nvidia Graphics this post is for you

Note:
PowerMizer is a feature created by Nvidia to save power and reduce heat on Graphics Card
PowerMizer is built into all the graphics card
It is optional for Desktops because Desktops have infinite power from Wall Sockets and manage heat well
However it is very essential for Notebooks as they have to conserve power and produce less heat when no intense graphical application is running

Run “Regedit”

Go HKEY_Local_Machine\SYSTEM\CurrentControlSet\Control\Video\{ Your graphics adapter}000 and 0001

To locate the registry entry expand all the entries until you see one with lots of registry setting That will be the the registry containing your Graphics Options


Right click on the right Window to create a new DWORD 32bit value
The value name change to “PowerMizerEnable” value select “1″ in hexidecimal
Repeat
The value name change to “PerfLevelSrc” value data “3333″ in hexidecimal


Reboot
Verified using GPUZ and HWMonitor

The Result

After PowerMizer is activated successfully you should see the GPU Clock drop below default clock at idle

Optional:

If you want finer control over PowerMizer change “PerfLevelSrc” values to achieve desired effect

  • PerfLevelSrc=0×2222 - fixed PowerMizer mode (and appropriate fixed frequency) is used for battery power source and fixed PowerMizer mode is used for AC power source, these PowerMizer modes may be the same or different
  • PerfLevelSrc=0×2233 - fixed PowerMizer mode is used for battery power source and adaptive clock frequency strategy is used for AC power source
  • PerfLevelSrc=0×3322 - fixed adaptive clock frequency strategy is used for battery power source and PowerMizer mode is used for AC power source
  • PerfLevelSrc=0×3333 - adaptive clock frequency strategy is used for battery and AC power sources

Thứ Hai, 24 tháng 11, 2008

How to optimize Vista Boot

Using Windows Vista Disk Defragmenter
Starting with Windows XP and continuing in Windows Vista, the Prefetcher service will automatically optimize the location of the boot files in your hard drive using Windows Disk Defragmenter. However, this occurs only after a certain number of boots and when it gets around to it (because it runs only when your computer is idle).
Microsoft has a talented team working on the Prefetcher service that even took into consideration your system boot changes. For example, you might install an updated device driver or add new hardware. To solve this problem, the systems will re-defragment the boot files every three days.
Tip: Windows keeps track of the last time that it has optimized the boot file so that it can calculate how often it should run the boot defrag. If you are interesting in finding when the last time was that the boot defrag was run, open regedit and navigate to HKEY_LOCAL_MACHINESOFTWARE\Microsoft\Windows NT\CurrentVersion\Prefetcher, and then look for the key named LastDiskLayoutTimeString.
An operating system that takes care of itself? Yes, Windows is getting smarter and smarter. However, there is still one problem: There is no possible way to directly initiate a boot defrag. The only way is to leave your computer on for a little while without using it at all. If you are impatient and do not want to wait, I have a solution for you.
As I mentioned earlier, the system will initiate the boot defrag only when the system is idle. Typing in a command that will start the boot is not possible. However, you can tell your computer, even when it is not idle, to process the idle tasks. This will indirectly start the boot defrag. Because the boot defrag is most likely not the only idle task waiting to be run, other processes will be run, too, which can cause your computer to appear to be doing a lot of hard work—from a few minutes up to half an hour—as it completes all tasks. During this time, your computer should not be used for any intensive activities such as playing games. If you try to use your computer while the idle tasks are being processed, you will notice slow performance until the tasks are completed.
Perform the following steps to process all idle tasks:
  1. Click the Start button, type cmd in the Search box, and press Enter.
  2. When the command prompt opens, type
  3. Rundll32.exe advapi32.dll,ProcessIdleTasks and press Enter.
  4. Your computer will now work on the tasks.
Performing these steps will allow your system to defrag the boot files; however, the boot defrag is done every three days. Processing the idle tasks more frequently will do nothing to help you boot because the boot defrag will not be on your idle tasks lists all the time.