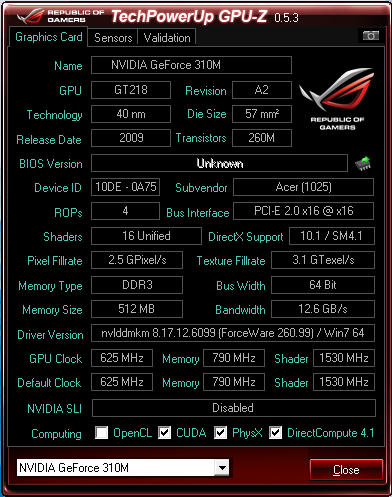
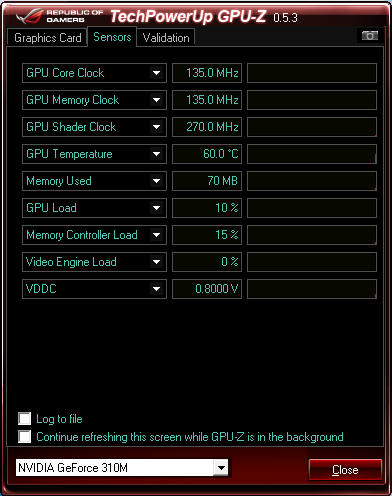
In fact it is possible to reduce the voltage in Default Mode. Technically it should save some power, hence I modified the VGA BIOS Module using Nibitor and set the Default Voltage to 0.80 Volts instead. Flashing BIOS is to be attempted by the tech savy, this BIOS has been tested to be working on my laptop hence any issue with incorrect flashing would be your responsibility. I share the modified BIOS here.
If you have tried downloading Songbird from the official site, you might have noticed it is only available for Windows and Mac users. This guide will help you to install Songbird in Ubuntu. If you are wondering what is Songbird, it is a digital jukebox rich with features. It supports most of the popular handsets like iPhone, Samsung Captivate, Epic 4G, Vibrant, Fascinate. It also has pretty cool extensions like radio stations, lyrics display, last.fm info..etc. It is a alternative for iTunes in Ubuntu. My favorite is add-ons Mediaflow+Soundcloud integration.
Guide/Installation-
There is no PPA available for songbird yet but you can install it from the source. It works on both 32bit and 64bit. To install it in Ubuntu 11.04, open the terminal and type:
wget http://download.songbirdnest.com/installer/linux/i686/Songbird_1.9.3-1959_linux-i686.tar.gz
tar zxvf Songbird_1.9.3-1959_linux-i686.tar.gz
cd Songbird
rm /lib/libgst*.so
./songbird
After that you will get a window helping you to configure and install Songbird.
You might want to create a link, to do so click Main Menu on the Unity-panel -> click New Item to create custom-launcher.
And in the dialog box enter Name as Songbird and Command as /home/user/Songbird/songbird *Note: Replace ‘user’ in /home/dexbuntu/Songbird/songbird with your username.
Tested it in Ubuntu 11.04 and I am pretty sure it works.
You may not want to mess up your existing system by installing Android OS on top of it. In that case, it is advisable to create a separate partition for Android installation on your hard disk drive. Make sure that the drive has a storage space of around 256MB or higher. I bet this wouldn’t be much of a problem as most drives come with tonnes of Gigabytes of storage space anyway. Once you have the drive partition ready, remove or backup any important files from the partition to avoid corruption.
Now, you’re ready to download and install Android on your computer. Follow the link below to download the Android OS. On the x86 download page, navigate to Stable Release section and download the latest installation iso for PC/Netbook.
Once the download has completed, install the Android image file on a empty flash drive. The embedded video below shows how to get it done using UNetbootin. You can also use the flash drive as live CD to preview Android OS on your PC before deciding to install it on your machine.
Ready to run Android on your PC/Netbook?
*if you’re not sure whether your PC/Netbook is fully supported, click here.
Now that you have your bootable flash drive containing Android OS ready, it is time to reboot your computer from your flash drive. Not all machines will boot automatically from USB flash drives. For that, you may need to change the boot options in the BIOS.
Change the order of the priority so that the system boots from USB flash drives first.
When you’ve managed to boot from the flash drive, you’ll see the following menu on your screen. If you wish to only preview the Android OS on your PC/Netbook, you may select the option “Live CD – Run Android-x86 without installation”. Other wise, just select the option “Installation - Install Android-x86 to harddisk“.
After successful booting, you will see a partition selection dialog as shown below. You can choose an existing partition to install Android-x86, or you can create or modify partitions by choosing ‘Create/Modify partitions‘. If you wish to install Android on external hard disk or if the target drive is not shown, select the ‘Detect devices’ option.
Android-x86 can co-exist with other operating system or data in the chosen partition. If the partition is previously formatted, you may choose ‘Do not format‘ option to keep the existing data. Otherwise, choose a filesystem type to format. Let me warn you beforehand that although Android can be run successfully on FAT 32 system, yet it cannot store data to FAT32 partition. In the end, your system will end up behaving like live CD and you’ll lose all data after power off. Therefore, it is strongly recommended not to install Android on FAT 32 partition.
The next question is whether to install boot loader GRUB. Select ‘Yes‘ and the installation will automatically begin.
Please note that the installer only creates boot items for Android-x86. If you need to boot from Windows, you’ll have to add the following lines to /grub/menu.lst manually.
title Windows
    rootnoverify (hd0,0)
    chainloader +1
Let the installation process run its course. You’ll see the following screen when the installation is completed successfully.
You’re ready to run Android on your system now. The embedded video below will give you a glimpse of Android OS running on a PC. You will notice that your PC will boot in less than 10 seconds on Android.
For most part, Android supports the usual hardware found on PCs including cameras and WiFi. However, you may want to check whether your hardware are supported from here. And also keep in mind that the Android system may not fulfill your computing need as it was designed for mobile phones.
A taste of what's new from Android 3.0 Honeycomb..
DEXCHOiCErecommended this because of their tech developed to everyone now & future.. I like the others tech too like iOS, Windows, Linux ++.. but I'm hungry for this...
Recently I have taken the switch to KDE instead of GNOME 3.
This is due to the fact that GNOME has taken the route of dumbing down the interface to resemble those of android and Meego, I decided to search for an alternative Desktop, because doing 3 steps to achieve something once done in 1 step is definitely a regression.
An OS on Desktop has to have sufficiently accessible and powerful interface especially for users of Linux who enjoys the level of customization they always had before.
Although I still hate applications that start with the 'K' character the usability of KDE makes this forgivable.
Rule 1: There is always a KDE equivalent of GNOME Application. Rule 2: You are still running LInux.
The Concept of KDE after running it for a while is the use of Widgets. You will find it is surprisingly very similar to Windows 7 in terms of GUI (Actually I think Windows 7 copied UI from KDE as KDE 4 was released first but that is not what we are interested in today).
Some of the tweaks I used in OpenSUSE Gnome 11.4 is still applicable like the fonts and applications.
Some Screenshots on what I think are great in KDE 4.
Managed Thumbdrive Action by Clicking the USB Icon on the TaskBar
Nice Graph displaying the Data Rates on a Network Interface
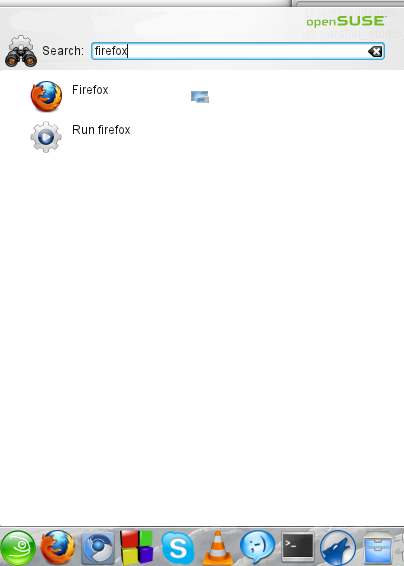
Type the program you want to run and it appears on the menu like Windows 7
Right Click on it to add a shortcut Taskbar or Desktop
Personalization Control Panel with Grouping
Able to Group Folders according to types
Sysinfo to display computer information
Plasma Desktop Windows, Note the glowing borders.
Add Widgets of any type of any number just like Windows 7 gadgets
An Example of a Useful Widget, the weather widget
Desktop Effects Control, you can customize the effects you want, KDE Desktop Effects also has a graceful fail-over when an errors occurs. You can also choose to disable Desktop effects to save power just like Windows 7.
I hope these feature are convincing enough for you to try KDE because because it certainly won me over. Enjoy!